
Backpack Studio
Create professional sounding podcasts and radio, from anywhere.
How to use the noise gate in Backpack Studio to make your podcast sound better.

Backpack Studio users are always on the go. We can’t help recording in noisy environments - in crowded public spaces, or near ocean waves, wind, air-conditioners, traffic etc. Recording on the go is what we do!
To remedy this, we've placed a noise gate in your backpack. You can use it whenever you like to reduce those unwanted background noises from your podcast.
When recording your podcast, noise gates keep out noise work by quickly turning down the input gain of the mic whenever you stop talking (aka “closing the gate”) so the background noise gets recorded at a lower volume. When you resume talking the gate quickly “opens,” allowing the mic to return to its normal volume. The end result is a cleaner sounding recording.
The noise gate In backpack studio is turned off by default. Try it out! Put on a pair of headphones and enable the mic. Go into the settings and select “Mic Effects." The noise gate is located at the bottom, underneath the eq effects unit. Switch it on.
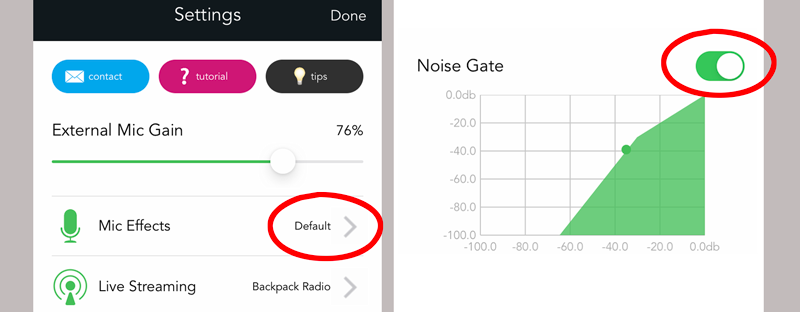
The graph you see on the right is a live visualization of your microphone's input signal vs the output volume being set by the gate- the horizontal position of the moving dot represents the input signal in db. The vertical position represents the output db after being adjusted by the noise gate.
Adjust the sliders below the graph and talk. Where you need to set the threshold and ratio will be unique to your situation.
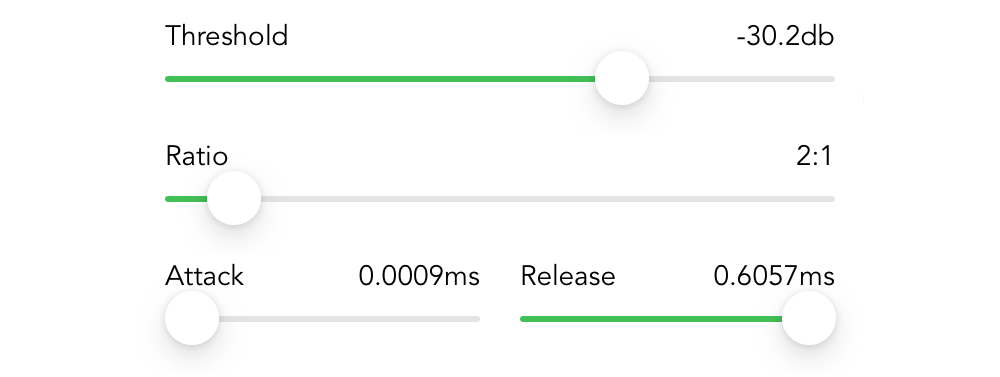
Threshold is the most important setting. When the input volume of the mic dips below the threshold value, the gate closes and the volume will automatically decrease by the specified ratio. If the threshold value is set too low, the gate won't close. However, if the threshold is set too high the gate may accidentally cut off your voice.
The ratio slider dictates the degree to which the volume is reduced (usually a ratio between 2:1 and 3:1 works best). If the ratio is set too high, the volume change may be too drastic and create an unpleasant "pumping" effect. (Note: A ratio of 2:1 technically means that if the input volume is 10db below the threshold level, then the volume will be reduced by 20db. 3:1 would mean 30db, and so on. You can see this happening in real time by looking at the graph.)
The attack slider dictates the speed at which the gate reopens after it closes. We recommend having this at zero so that percussive syllables aren't cut off when you speak.
The release slider defines the length of time the gate takes to close and fade out the volume. Too low of a release time can abruptly cuts off the sound.
Use the noise gate only when necessary. When you are recording in a nice, quiet environment you probably don’t need it. Keep in mind that sometimes the surroundings may be too noisy for the noise gate to work well; e.g., at a concert or a crowded bar.
Now you can use your new audio engineering knowledge to make cleaner recordings in noisier places! Get in touch on social media and let us know how it worked (twitter facebook instagram.)